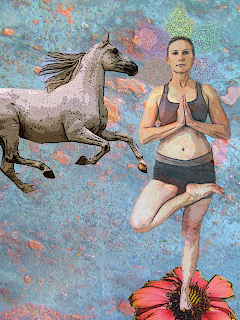
I haven't had the courage to post any of my digital art but if anyone out there in etherland has any interest, I will make my debut today! It all starts with a photo which is uploaded into Photoshop! I don't know more than about 20% of the capabilities that photoshop offers but it is fairly easy to navigate through the Filter Gallery and find renderings that are artistically pleasing.
If you are not familier with this, go to your header and click on "Filter". I personally like using the "poster edges" feature first (which is in the "artstic" category), followed by "paint daubs" or "dry brush" (also in "artistic" heading). It allows you to keep the outline of your picture but gives you a painted feel.
For the yoga picture, I created the background from a photograph of Travertine tile. I clicked on "Image", then "adjustments" and then used the "Hue Saturation" button to increase the color saturation to bring out lots of hues. That created my background.
Then I used the "Poster edges" feature in the "filter" for the two separate pictures of the horse and myself doing the yoga posture. After I got the horse and yoga posture the way I wanted ( also using the hue saturation feature), I used the magnetic lasso to outline the horse/posture, used the "Edit" then "copy" and then "paste" to get the two pictures on my travertine background. Since the horse and yoga posture are separate layers, you can move them around separately untill you find a good spot using the move tool. I like to keep the layers separate untill I am completely done. That way you can edit each layer separately. I repeated the process for the flower and the design around my head. If you want a design to overlap another design, simply drag the layer down below the other layer. To show the layers, simply go to "Window" and click on "layers" and the layer window will display on your screen. Once you are sure of your completed design, click on "layer" and scroll down to "Merge layers" and all the layers will merge. Now you can edit the picture as a whole (using the filter) if you want to continue to render your desing.
Hopefully, this is not too confusing for the beginner using Photoshop!
